
How to make art with the fourth state of matter
A birds eye view for anyone new to plasma glass art


Since I think most readers here currently may not be familiar with working in neon or plasma (though tell me if you are!), I figure it might be worthwhile to do a birds eye view of how to make something, whether it’s a neon sign, a plasma sculpture, or something in-between.
There are a lot of other details and steps I won’t get into in this post, especially since the process can be different depending on what specifically you’re making. This post is meant to give a basic idea of how this works for someone unfamiliar with the practice and showcase different work from some of the artists I admire who create plasma art to give a flavor of what’s possible with the medium.
I’ll include additional resources at the end you can check out if you are curious to dive deeper into the art and science of plasma.
The very, very basic steps are as follows:
Make a glass thing
Test and remove impurities
Fill with gas
Seal the glass thing
Step 1: Make a glass thing
For neon signs (or any neon art), this would be making a design by bending and manipulating a glass tube with heat using a variety of different torches. Some torches are small like hand torches for detail work (like small bends or attaching electrodes), while other torches are larger like ribbon burners that enable you to do larger bends. To complete the piece you’d attach an electrode at each end of the tube. The photograph below by AGF Burner shows a selection of different torch parts you may come across when working with neon.

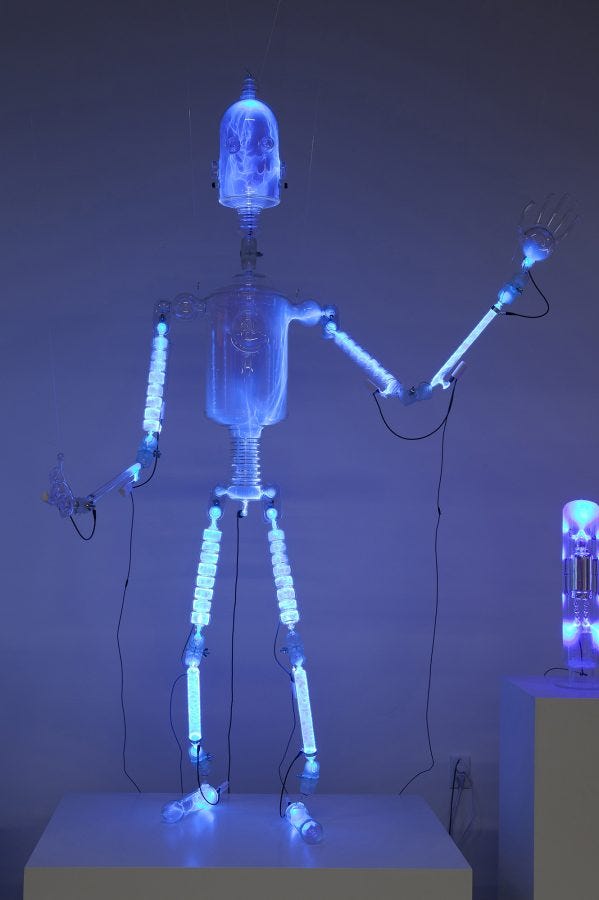
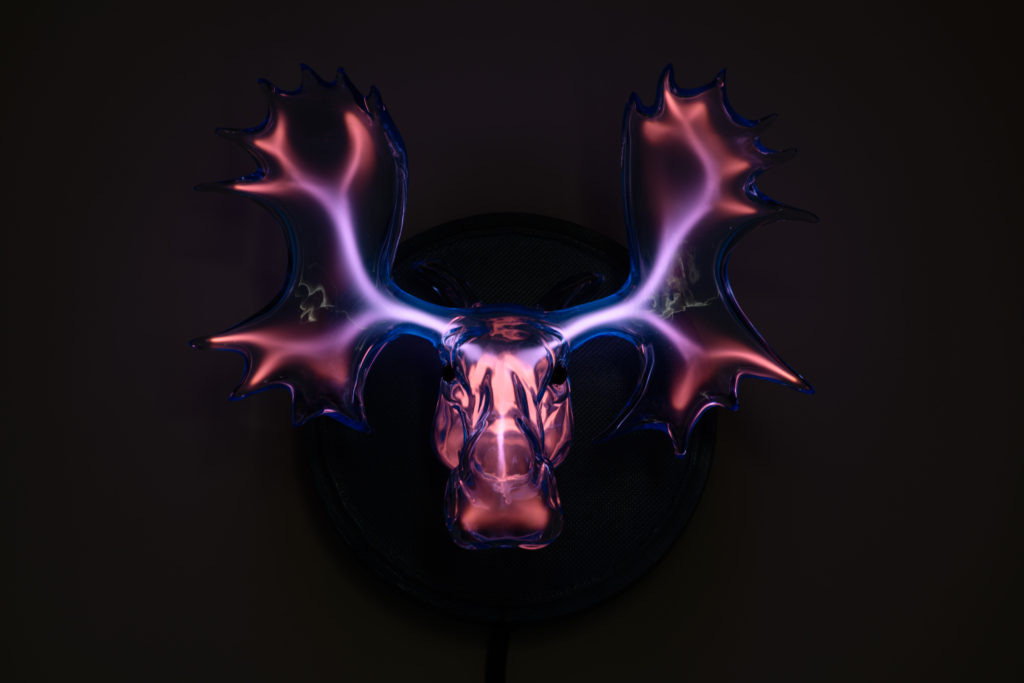
When it comes to plasma art, the parameters are much broader. Plasma art can be glassblown or lampworked vessels, small fused glass panels, or giant tubes or orbs that you might find in a science museum. They can also be sculptures, like this life-size PlasmaBot by Wayne Strattman or the Plasma Moose Trophy by Percy Echols II and Chris Ahalt below.
Note: You shouldn’t pick just any glass vessel to do this process with — avoid objects with flat or nearly flat sides (the fused glass panels are a bit different depending how they’re designed, so don’t try to recreate on your own without experienced guidance first). From Wayne Strattman: “One caution is to warn people not to fill any piece with flat or nearly flat sides as they may implode! It’s quite dangerous since an implosion has the same energy as an explosion. I had a piece unexpectedly implode when I wasn’t [in the studio] and glass was blown across the room.”
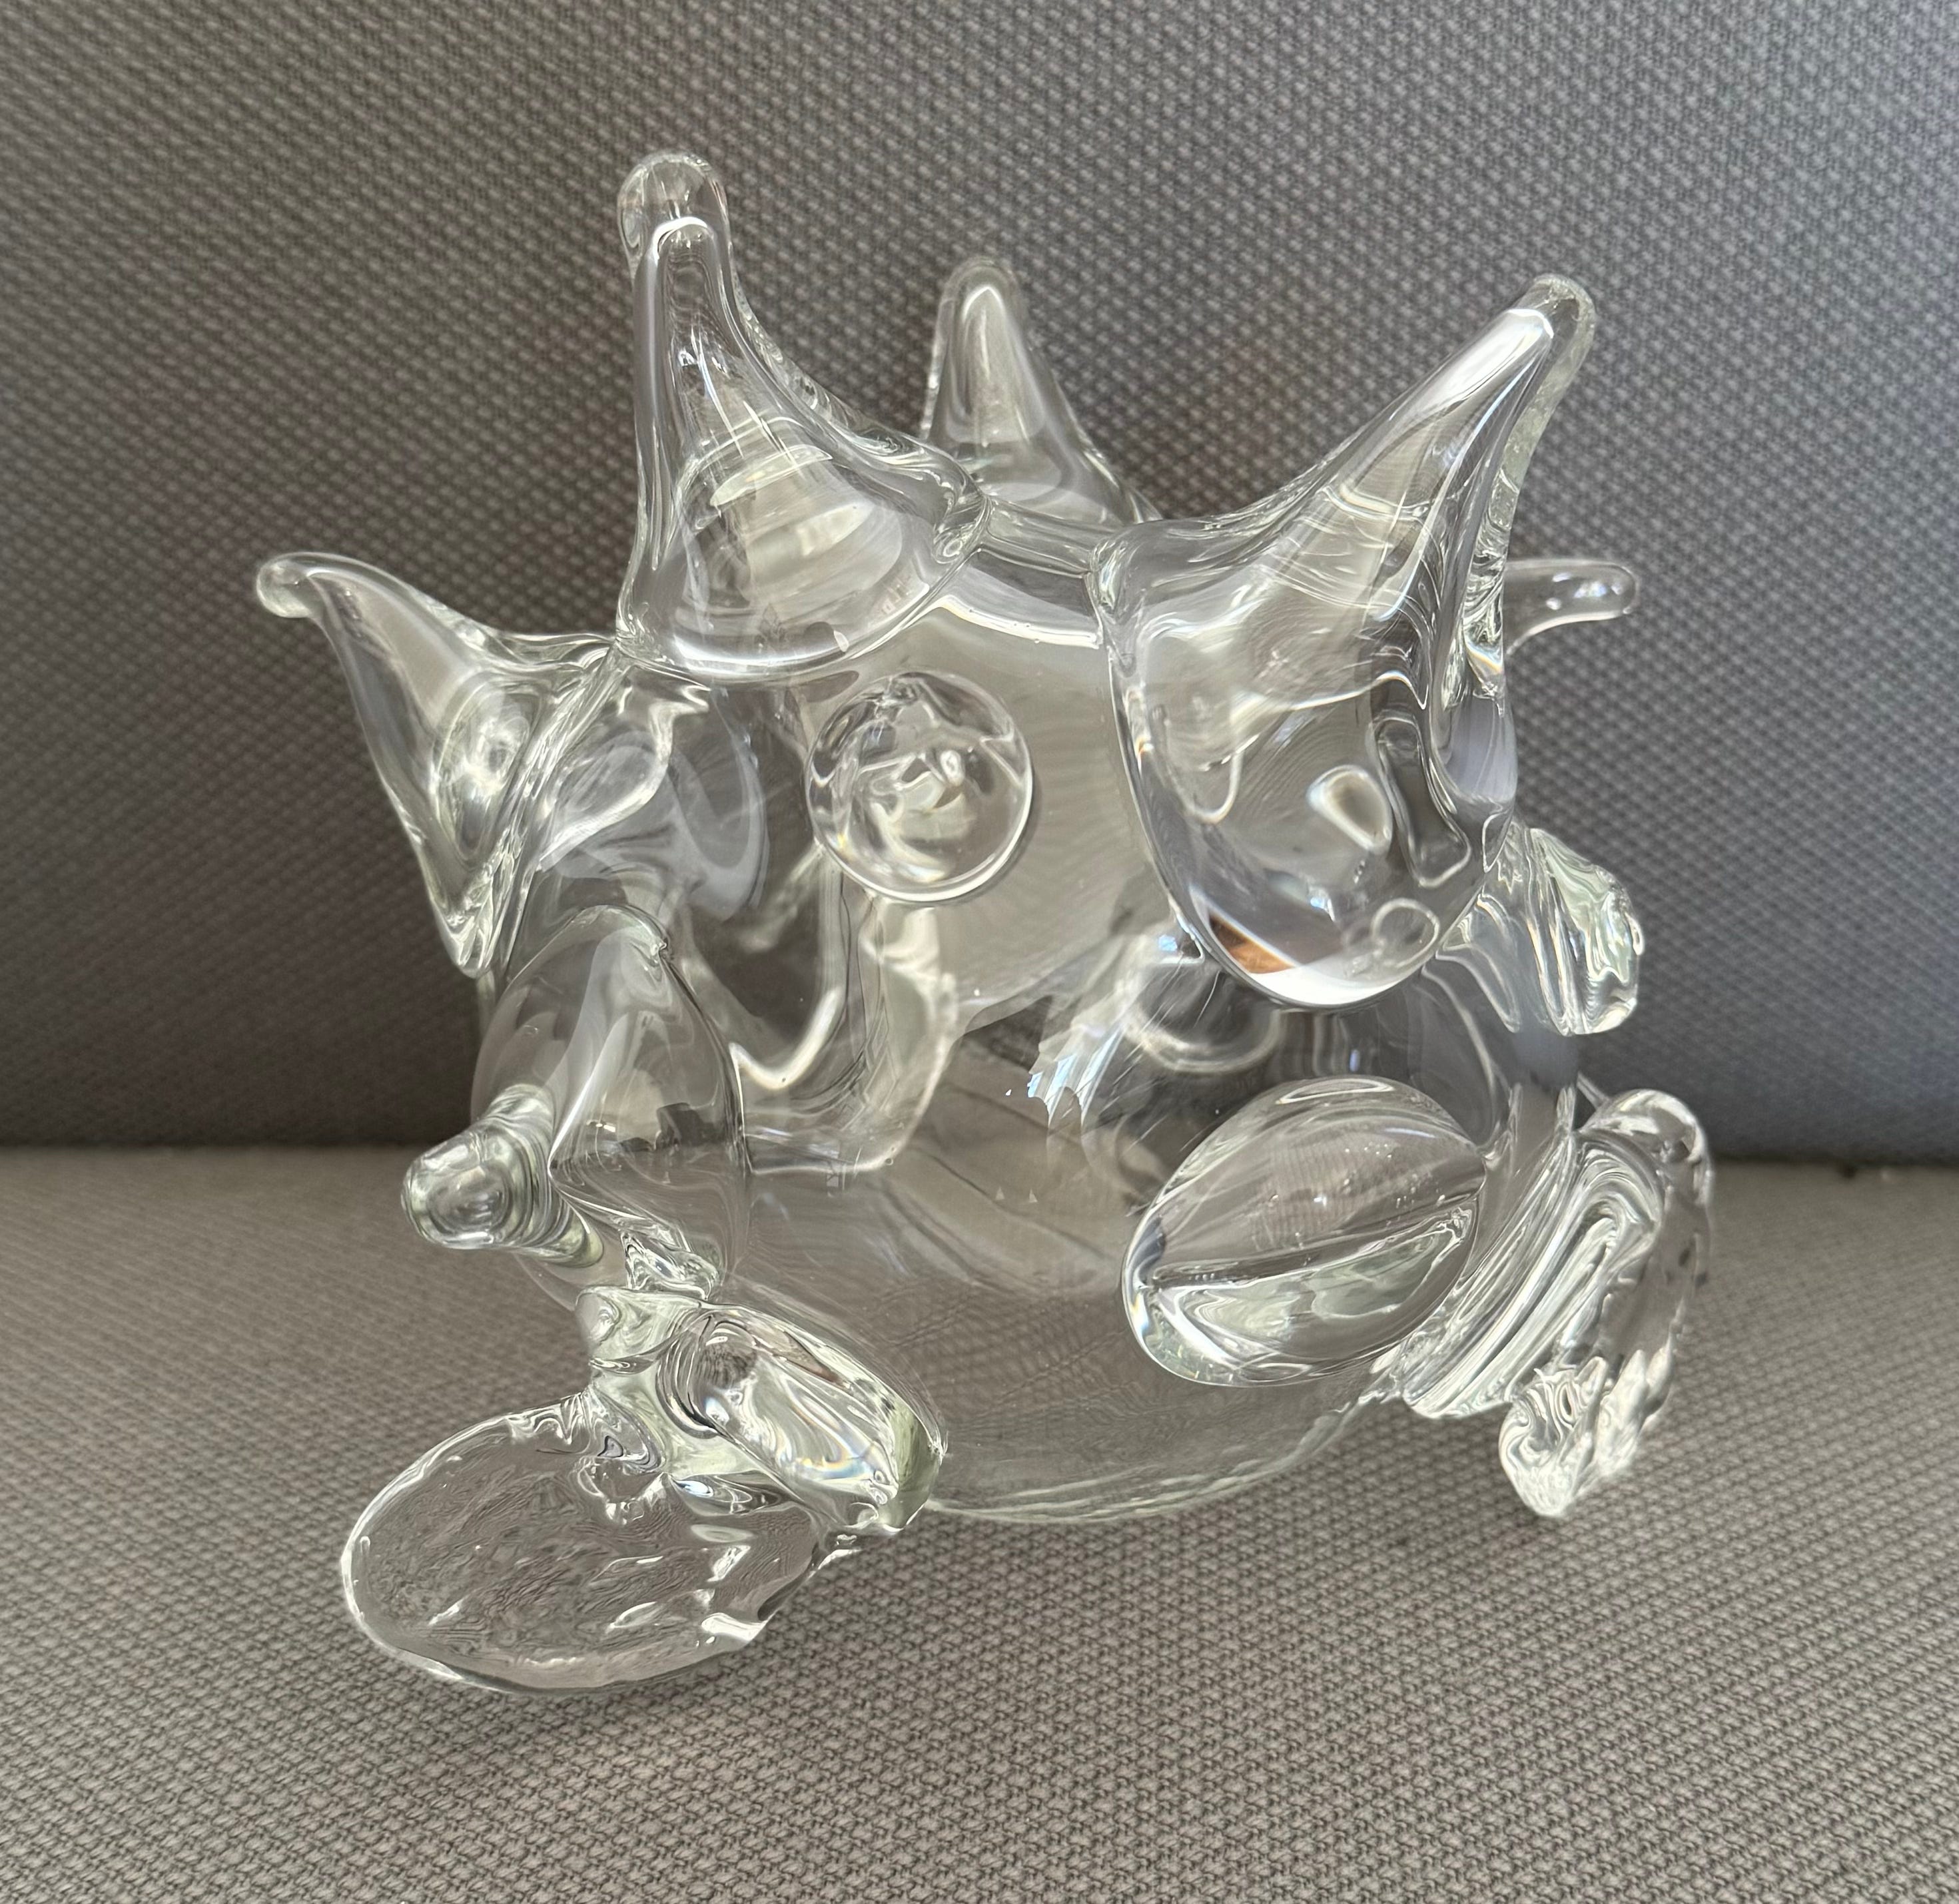
They could also be usable products like pipes, mugs, bowls, or even tables. I’d even consider neon signs/art to be a form of plasma art, since they are vessels, too, but I’m separating them out here because neon is practiced more than other forms of plasma art.
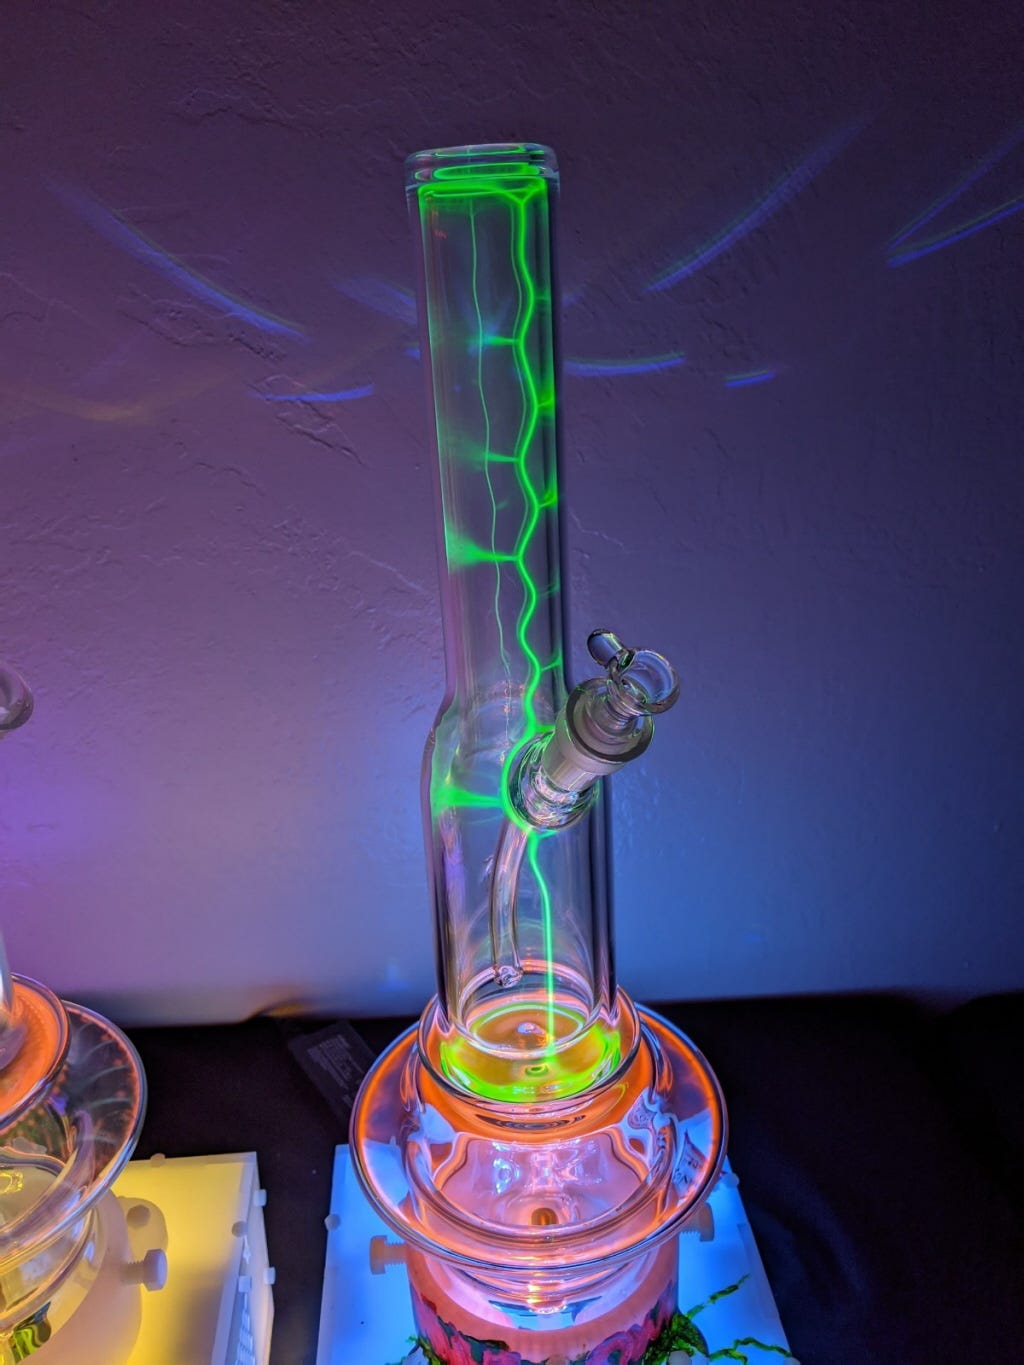
Plasma pieces can have one electrode, two electrodes, or even no electrodes! It depends on how you’re designing it and how you’re going to use it. For example, the above piece by n3rdglass is a functional plasma pipe that does not have any electrodes attached to it, but it’s powered by a Tesla coil base.
No matter what you’re making, the piece cannot have any holes! Holes are bad, it means that the piece will leak and won’t be able to hold any gas, which means that the piece won’t work the way you intend it to. The piece also needs to be durable enough (thick enough walls) that it can withstand the next steps for processing the piece by heating it to high temperatures and holding a vacuum and different gasses.
Step 2: Test and remove impurities
You made your glass thing and you’re happy with it. Now what? It’s time to test whether the piece can hold a vacuum and remove any impurities that are left inside the piece.
To test whether the piece can hold a vacuum (and thereby hold the fun gases you want to put into it), you’ll hook it up to a manifold, which for plasma and neon art, contains a bunch of different things you’ll need to process the piece including a vacuum, gasses, a place to hook up your glass piece, and gauge(s) to view different pressures in the manifold system.
At this stage, you’ll want to use a vacuum and a very precise pressure gauge to test whether the piece can hold a vacuum. If it does, great! You can proceed to the next steps. If not, that means there’s a leak! In this case, you’ll want to figure out where the leak is coming from and try to fix it. Even a very small leak (seriously, any leak, even minuscule) means that the piece will leak, will not hold gas, and will not work, so precision here is absolutely necessary.
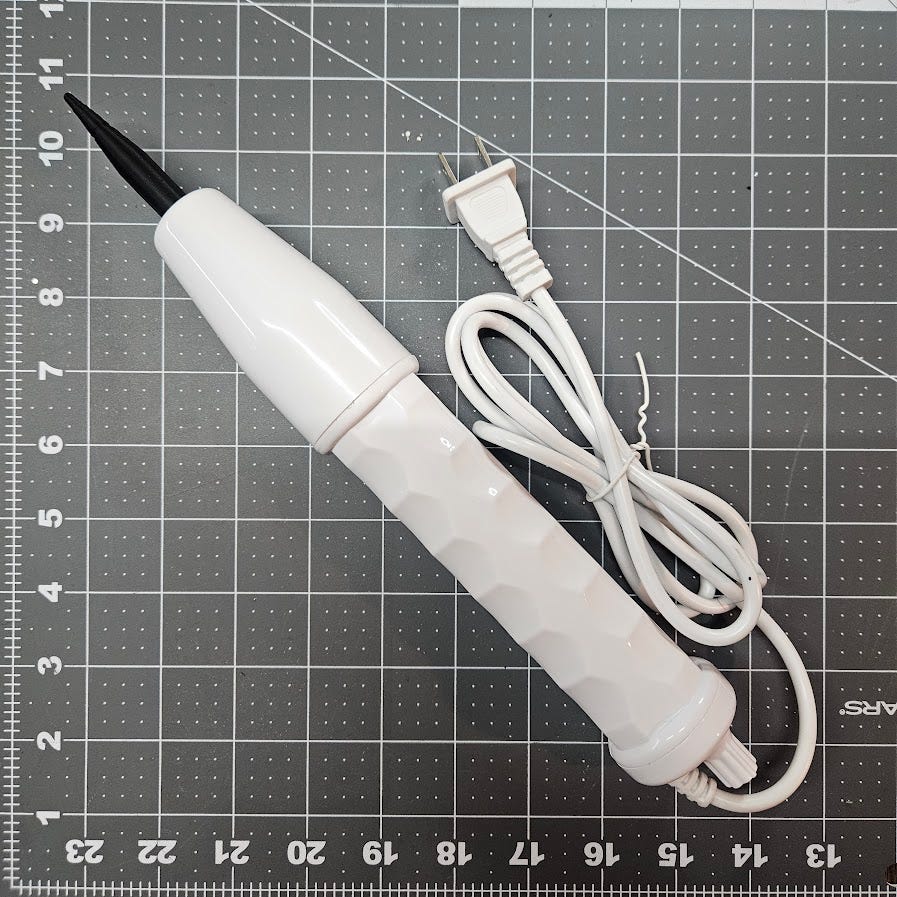
There are a bunch of ways to test leaks depending on the type of leak, which I won’t get into here, but one of the more common ways to detect leaks you’ll hear about is using a high frequency spark coil (also called a handheld Tesla coil). The spark coil generates electricity, and if you can find the leak this way, you may see a visible blue/purple-ish glow from the spark where the leak is. Sometimes though, you can’t find the leak this way but you know it’s there (as is the case with some of my panels sometimes), in which case you’ll need to find other ways to identify and fix the leak.
Once the piece holds a vacuum, you’ll want to remove impurities. This includes things like moisture, air, and any molecules that you don’t want in there that will interfere with the gas you want to put in.
To remove impurities, you’ll essentially want to heat the piece enough to remove them. If you’re making a plasma art piece, this step may already be done if you’ve recently gotten it out of the kiln and it was heated to high enough temperatures to remove those impurities. If you’re making something like a neon piece with two electrodes, which typically hasn’t gone into a kiln, you’ll probably be working with a bombarder, which uses electricity to quickly heat up the piece and remove impurities.

Using a bombarder or using a kiln to “bake out” a piece both can work to accomplish this step — what you’ll use depends on the type of piece you’re making. You can’t use a bombarder for most plasma pieces (they require pieces to have two electrodes, and the quick heating/cooling can break most plasma pieces), and while you *could* use a kiln to “bake out” a neon piece, you’d need a kiln big enough to do so, which for things like large neon signs would mean you’d need something ridiculously big which can be impractical, so the bombarder is usually the way to go for neon pieces.

Step 3: Fill with gas
Now for the moment we’ve been waiting for… making things glow!
Back to your manifold, you’ll have an area where you can have gas tank(s) attached. When the piece is holding a vacuum and connected to a transformer, you’ll fill it with gas.
There is a lot of calibrating when it comes to gas levels and different transformer/power supplies that I won’t get into here — but this is very important to test because you’ll want something that looks cool (of course) but can run without potential for overheating or turning off after short periods of time.
Typically, you’ll see pieces filled with some combination of noble gasses — neon, argon, krypton, helium, and xenon. Each gas produces a different visual effect and color. Xenon you won’t see much of anymore, since it’s very expensive and the prices have only gone up more in the last few years, especially from the war in Ukraine where a lot of the xenon supply comes from.
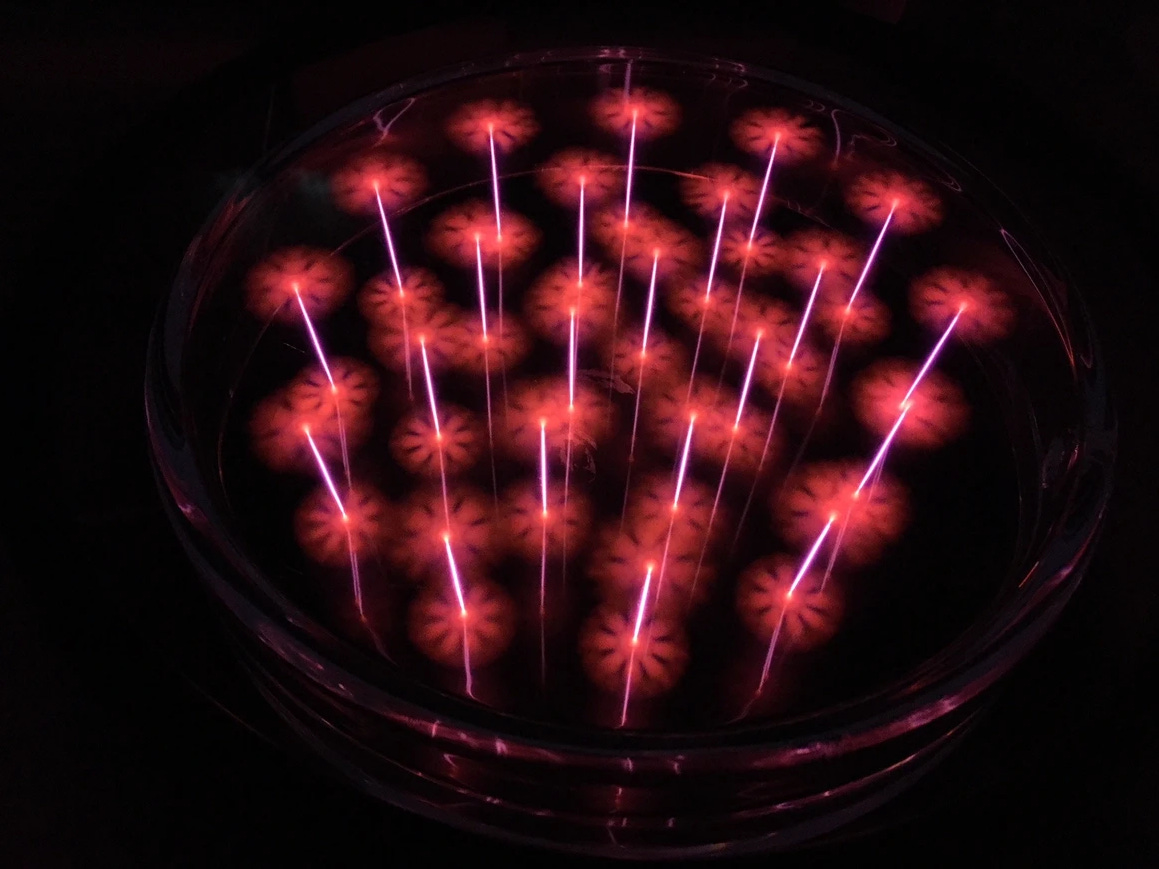
Other things can be used, too, for different effects. You might see mercury used with argon, especially with neon signs, for a bright blue glow. Some artists have also worked with nitrogen and even very small amounts of air to achieve different effects. Ed Kirshner has experimented with a variety of factors, including different gas mixtures, different Tesla coils, and vessel geometry to create a variety of effects such as the Dancing Mushrooms above (and if that photo is intriguing, check out the videos of his works in action!)
You could also do multiple gas fills within the same artwork, as Angela McHale (Website/Instagram) does with her figure below called Shots Fired, where the figure and the arrows are filled with different gases for different color and lighting effects.

If your piece is coated with phosphors, which is kind of like glowing colors that can react to the gasses, this can also open up more options for colors and effects like with the “rainbow plasma” panel I experimented with at the top of this article. There are a lot of options for designs and it’s one of my favorite parts of the process!
Step 4: Seal the glass thing
You’ve found the right look and everything looks good, which means it’s time to seal your glass piece so you can display it somewhere and marvel at it. To do this, that means you’ll tip off the piece, which is sealing the glass tubing that’s attached to the manifold. You’ll want to be careful here to not break the piece or produce any holes, such as while sealing off the electrode, or overheating other parts of the piece and causing it to crack, since that produces a hole which means that all the cool gasses you just put in leave your piece and you’re left with an empty piece to fix. As long as you have done a smooth tip off and the piece is sealed, when you hook up the piece to light it up, it should work and you’ll have a finished piece!

Additional resources
This was a very high level overview of how to create neon and plasma art. The devil’s in the details when it comes to getting things just right and making sure the piece works. If you want to dive deeper, here are a few places I’d highly recommend and are helping me in my own journey.

The Art of Plasma Book by Wayne Strattman
Wayne Strattman, who’s been working in this art for decades (he’s also the person who got plasma balls and panels into Spencers stores for all of us to marvel at), has put a great deal of what he knows about plasma art into this book. It gets into the details of how to make all kinds of plasma art and is a must have if you want to try making your own work. He also goes over the history this art and science more broadly and features some great artwork from different artists throughout, making it a great coffee table book, too.
Buy from Wayne Strattman (contact him directly)

Taming Lightning by Percy Echols II
Percy Echols II is a plasma artist who’s taken great measures to share his own exploration and learnings in plasma. He’s recorded dozens of interviews with different artists who work with plasma and neon, presentations about the ins and outs of all things plasma art, conducts workshops across the country and at his home base at Pittsburgh Glass Center, and runs his business Taming Lightning which provides a lot of necessary supplies for up and coming plasma artists (including myself). Depending on where you’re at in your journey, if you’re curious to learn more about the art in general and how other artists work, check out some of his podcasts, or if you want to roll up your sleeves and start making, support his Patreon and learn from his posts there, take a workshop, and get your supplies to get started!
Take a neon or plasma class
If you want to get started and are able to, take a class or workshop! Getting hands on experience is so important for practicing and seeing if you like it. Also, connecting with different artists (teachers and students) can be helpful with the learning process, and honestly it’s just nice to socialize and make new friends who you can geek out with over the art.
There are a bunch of different beginner courses scattered across the country that you might be able to take near your home. Neon Makers Guild has a few places here to start. Some glass schools also offer neon or plasma courses during their different workshop periods if you’re able to travel for a week or so or are close by. Some schools include Pittsburgh Glass Center, Urban Glass in NYC, Pilchuck in Washington, and Penland in North Carolina. I’d recommend starting locally if you can, so you can get a taste of the art and see how you like it before diving deeper.
Thank you to Percy Echols II for reviewing this article. Also, thank you to all the artists and businesses for allowing me to share their work in this post! I hope it inspires more people to become fascinated by plasma and neon art. :)
Thanks for reading!
If you’d like to support my work, you can follow, tip, or collect a piece through the links below.